Showing posts with label decorating. Show all posts

Friday, January 25, 2013

Project of the Day - Valentine Subway Art


 I haven't been quite as productive with the projects of the day this week - but I did get a couple of things started...
and one thing finished!  I completed a Valentine Subway Art Sign!

I used my Silhouette vinyl cutter and three different colors of vinyl to create the wording. I painted one of my wooden boards and then applied the vinyl to create the subway art sign. Viola!

If you would like one of your own, just email me missy@sweetfunkyvintage.com and I will invoice you - $35 for the sign ($11.50 for shipping if you aren't local).

The sign measures 10" x 13".


Wednesday, January 16, 2013

Project a Day - Christmas Sign for 2013

 I realize it is January and a full 11 and 1/2 months until Christmas, but I thought I would get a head start!! Ha! Actually, I had intended (big surprise) to make this Rudolph sign over the holidays and it just didn't get done (again, big surprise).  My Dad was here and I asked him to prep me some plywood for the sign, and go ahead and make an extra board for my Mom too.  So, since these pretty, white boards were all prepped and ready and staring me in the face, I decided to get a jump on the Christmas holidays and go ahead and make them now!

I saw the sign on Pinterest originally, and the pin linked back here. It appears the original sign was painted on a 1/2" thick pine board, with some distressing.
I will be making my sign on 1/2" plywood, and using vinyl lettering instead.  But, I think the end result will be roughly the same.
I used my handy, dandy Silhouette cutter and cut out all of the lettering. Unlike my last project, I did all the words separately in order to not waste so much vinyl.  This lettering was going to be large enough to piece together with reasonable accuracy.
First, I placed the silver lettering for Rudolph.
Then, I added the big red circle for the O in Rudolph.

Here it is about halfway through. There was lots of measuring involved in this sign, so it took a lot longer to finish!
And, here it is all finished!  I still have to complete the one for my Mom, but I am pretty stoked to have a new Christmas decoration and it is only January! ;)


Tuesday, January 15, 2013

Project a Day - Family Sign

Today's project uses my Silhouette! I'm so excited to be using it to make something for my newly painted fireplace mantel!

I saw this sign first on Pinterest, but cannot link to it here, because Pinterest has flagged the original site as an unsafe link. Sorry about that!


I set up my laptop and silhouette on the kitchen island so I would have plenty of room to spread out and work!

I had a board that had been cut, sanded, and painted for a project that never quite got completed. So, I measured it and determined how big the lettering should be and how the spacing should be arranged.

I am a true novice at using my silhouette, so it is all a learning process for me. I decided to do the layout all in one, instead of piecing it all together. If I had smooshed all the lettering together and then cut it out and placed it on the board, I would definitely have used less vinyl. But, I'm just not that patient with measuring and placement, so I figured this was a better way to make it look neat.

Here it is with the vinyl cut out, and the negative vinyl removed.

Then, I applied the transfer tape. My silhouette came with all sorts of gadgets. I even know how to use some of them! My favorite is the dental pick looking thing - it is used to remove the insides of the o's and a's, etc.  This blue squeegee thing is used to really smooth on the transfer tape and the vinyl to whatever you are sticking it to.

Here is the vinyl removed from its backing, just stuck to the reverse of the transfer tape. It is now ready to be applied to my board.

I carefully placed the tape on the board, positioning the lettering where I wanted it to be. I even measured. a little.

I carefully pulled off the tape and here is my finished sign!

And, here it is on my newly painted mantel. What do you think?


Monday, January 14, 2013

Project a Day - Fireplace Mantel

This past weekend, I turned up the gas fireplace and enjoyed a book beside the fire for most of the day. It was a lovely way to spend a lazy day. With a military husband, a small business, and three kids 10 and under, lazy days are few and far between!  It was really great, until I realized that the fireplace had left soot marks all over my mantel. Whoops. I got out lysol dual action wipes and went to work.  Then, I got rags and more cleaners.  And a scrub brush.  Double Whoops. The soot had stained pretty good and the fireplace looked pretty bad.

Ick. Now what?  The mantel is stucco-ish, painted over several times with a dingy, off-white, semi-gloss paint. I've never really liked it that much.

Here it is, in all it's glory, close up:

Nice, huh?

Double Ick!  So, I decided to paint it as my project for today.  I went to Home Depot and bought a quart of semi-gloss primer and paint all in one, and a paintbrush. Oh, did I mention the color? Black!  


Once I got home, I got out my blue painter's tape and taped off the mantel. It was a little challenging because the corners are all rounded, and beneath the mantel is marble-y looking stone with rough stone edging at the top edge where it meets the mantel. The tape didn't want to stick very well to that.


I texted my husband one last time and asked if he was really ready for this, and he said go for it! I think that reaction was because he was glad that I hadn't been able to draft him into my little project this time!  


Here it is, in progress.


I looked over to the patio door and found our dog, Shady, looking at me. She looks nervous, don't you think? LOL


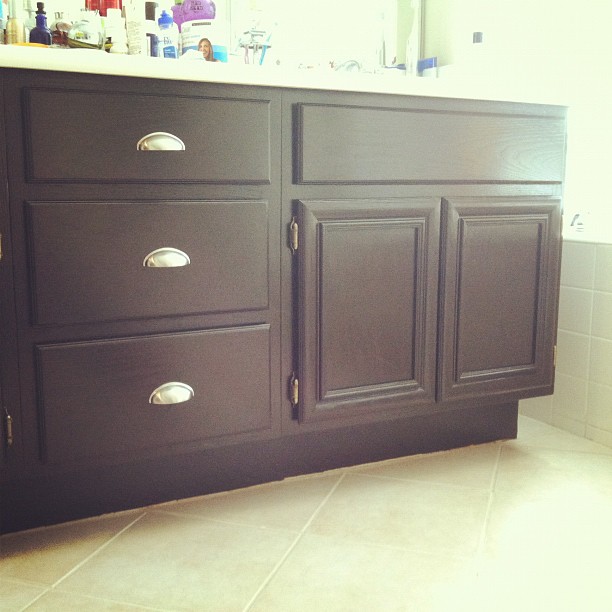
Here it is with the first coat on. What do you think so far?  It is a semi-gloss, latex paint, so I will put another coat on this evening before bed, and let it dry overnight before taking the tape off and seeing how it looks.
Then, I will try out a new mantel arrangement, I think! Pinterest.... here I come!!

Here it is all dry, with the tape removed!


Wednesday, October 10, 2012

Monster Mash! Halloween Ideas for all of us!

I love Pinterest. Love, love, love it.  I love looking at the ideas, the beautiful photographs, and saving the links for a rainy day in a variety of categories.  I have even been known to try some of the recipes, and crafts and decorating ideas that I have run across.

These are my favorite Halloween ideas:


How easy does this Pumpkin Quesadilla look?  My kids would love this!


Redbook shares how to make this glitter spider web using wax paper, elmer's glue, and glitter!


How adorable is this door? Crepe paper and some other items from around the house and you have a decoration to die for!

What great Halloween ideas have you run across lately?


Thursday, October 4, 2012

Little things can make a big difference in decorating


Look at my new light fixture!!  I love Ballard Designs. Who doesn't love them? After my bathroom re-do, I needed a new bathroom rug. I found one that I liked and could not resist also putting this awesome light fixture in my online shopping cart!  We had a can light above our kitchen sink that we never turned on and used.  So, I bought this light from Ballard and it couldn't have been easier to install! I literally unscrewed the flood light style light bulb that was in the can light, and screwed in the new fixture, wrapped the cord to the level I wanted the light to hang and slipped the cover up and it fit snugly into place.
The new light fixture gives off the warmest glowing light. I just love it!!


Tuesday, October 2, 2012

You can do it - The Big Reveal... Our New Bathroom!


So, not long ago, I posted the in-progress pictures of our bathroom renovation project.  Well,a few weeks ago, we finally had applied all of the coats of stain and topcoat and waited for it to dry (the hardest part for me!) and put everything back together!
What do you think?
Silly me, I forgot to take a before picture, but the cabinets were a golden oak builder grade cabinet with no hardware at all.  I have the same cabinets (yuck!) in my kitchen too.  


We purchased these bin pulls at the local Home Depot store. There was no hardware on the doors or drawers before at all.


Whenever we paint, no matter how well I tape things off, my husband manages to get a smidge of paint somewhere! Here is a little smidge on the closet door casing. Oops!


So, the moral of this story is... if you don't like something about your house, it may be easier to change it than you think! And cheaper too!  We followed the excellent directions from the blog, Monica Wants It, and I ordered all my supplies online through her recommended sources, or bought them locally, and it cost approximately $50!


Tuesday, August 28, 2012

Big Girl Room, part 3


Here is another project we did in G's new, big girl room... a pennant banner!  She doesn't have any real window treatments, aside from the mini-blinds. Since I'm on a budget and my goal is to bring in as much color and funkiness as possible, I whipped out some of Sweet Funky Vintage's fabric scraps, trims, pinking shears, and the sewing machine, and I whipped up this really cool pennant banner that I draped over the tops of her windows kind of like a valance. 


Monday, August 27, 2012

Sneak Peek


Here is a quick sneak peek of our latest home renovation/decoration project... 


I hope to be able to show you the finished product in the next few days, but for right now, this is just keeping it real! (and yes, those are diet coke cans holding up the wood in the picture above!)


Friday, August 24, 2012

Big Girl Room, part 2


Today, I will continue sharing some of the things I created to give my 9 year old a more grown up room!  I had an old lamp from Ikea, with a really plain, boring white lampshade on it, so I dressed it up with some really cool trims (again using the hot glue gun)!  The lamp bit the dust not long after I took this picture, and we replaced it with the coolest lamp from Target!
I also had this old mirror from my days of being a consultant with Southern Living at Home. The company has since folded, but I bet you could find a mirror like this on ebay if you tried. It was called the "dress me up mirror".  I just threaded some really cool polka dot ribbon through the holes.
There isn't really a "theme" to G's new room, we just want to make it colorful and a fun place to hang out. What do you think?


Thursday, August 23, 2012

Big Girl's Room

Well, I find it pretty unbelievable that I haven't blogged since April. How embarrassing! I am going to take the position that the easiest way to begin blogging again is just to jump right in!
I'm going to start with sharing a recent project... updating my 9 year old's room.  Previously, she had been sharing a room with her sister, younger by 3 years, and was really ready to have her own room.  So, over the past 4 months or so, we have been working on giving her a more grown up feel to her room.
I bought some painted picture frames on etsy some time ago, and hung them on the wall, but hadn't done anything to them. So, I popped back over to etsy and purchased some really cool chevron fabric that I knew Riley Blake had come out with. Then, I visited my local Lowes store, and purchased some cork tiles. I covered the cork tiles with the fabric, securing them with hot glue, and then put the covered cork into the frames. Voila! A new wall treatment that we can change around as we like!

Tomorrow, I will share another project I completed for her new room!